
Use Microsoft 365 with ExtraFax for Exchange
Link: http://www.extracomm.com/Extracomm/FAQ.NSF/FAQs/daa4f8b20dcdb43548257c7c002dfc7eApply to: ExtraFax for Exchange
Last Modified Date: 05/25/2022
Can I use ExtraFax for Exchange with Microsoft 365 ?
Yes. ExtraFax for Exchange supports Microsoft 365. This means Microsoft 365 users can send and receive faxes from their inboxes.
There are two cases in general and the setup will be different and depends on your environment.
If you have an on-premise Active Directory synchronized to Microsoft 365
You need to do the following:
- Setup Exchange online outbound connector
- Synchronize the required fax users from Active Directory to ExtraFax
If you do not have an on-premise Active Directory that is synchronized to Microsoft 365
You need to do the following:
- Setup Exchange online outbound connector
- Create local users to use ExtraFax. ( Starting from ExtraFax for Exchange 2.1, administrator can create local users for users outside of Windows Active Directory)
- OR Import users from Microsoft 365 Azure AD (Starting from ExtraFax for Exchange 3.0). Please refer to the FAQ Connect ExtraFax for Exchange with Microsoft 365.
This article focuses on the setup of Exchange online outbound connector. Please refer to the administration guide on how to create fax users using different methods.
To setup Exchange online outbound connector
Note: You need to acquire a public DNS name or IP address for ExtraFax server (e.g. faxserver.adatum.com) before this setup.
1) Log in to the Microsoft 365 Exchange admin center.
2) On the left side navigator menu, select “mail flow” and then select “connectors”.
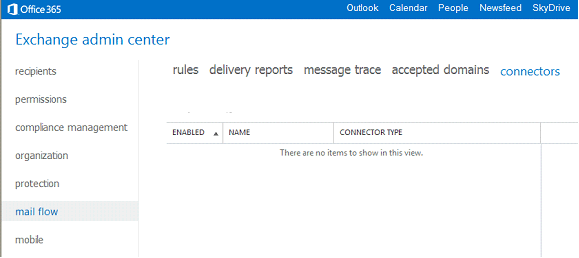
3) Under Outbound Connectors, click the “+” button to create a new connector.
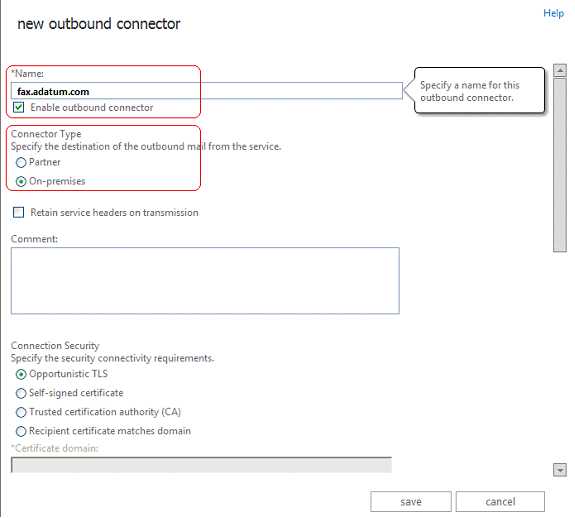
4) On the “new outbound connector” window, enter a name for the new connector. Make sure “Enable outbound connector" and “On-premises” are selected for Connector Type.
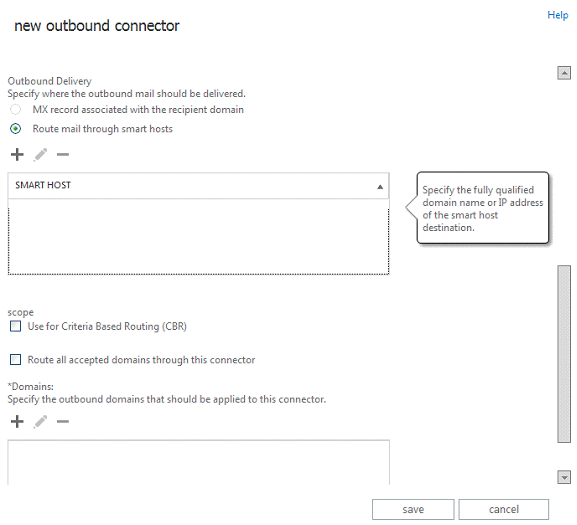
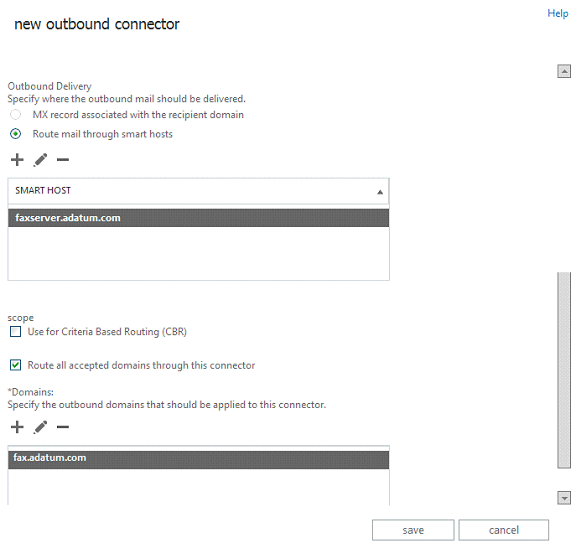
5) Scroll down the “new outbound connector” window. Under “Outbound Delivery”, make sure “Route mail through smart hosts” is selected. Click the “+” button to add a SMART HOST. The “Network Settings” window will appear.
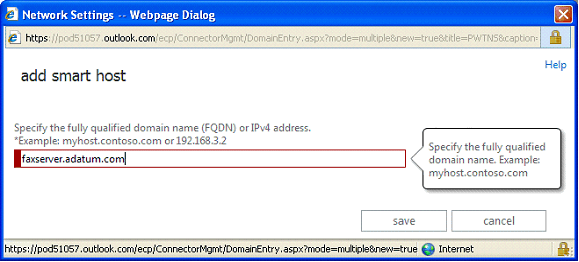
6) On the “Network Settings” window, enter the DNS name or IP address of the ExtraFax server. Click Save.
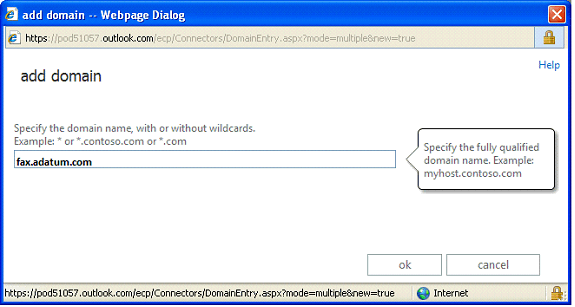
7) Scroll down the “new outbound connector” window. Under Domains, click the “+” button to add a new domain for the connector. The “add domain” window will appear.
8) On the “add domain” window, enter the fax domain for ExtraFax (This is the fax domain specified during the ExtraFax Initial System Setup). Click OK.
9) Check the option “Route all accepted domains through this connector". The completed “new outbound connector” window should look like the following:
10) Click Save to create the new outbound connector.
Once the setup has finished, Outlook users can send faxes to ExtraFax using the syntax <fax number>@<fax domain> (e.g. 1234567890@fax.adatum.com)